


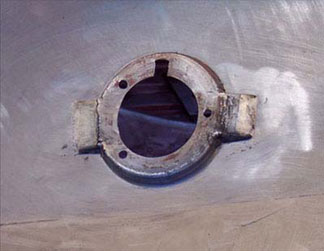
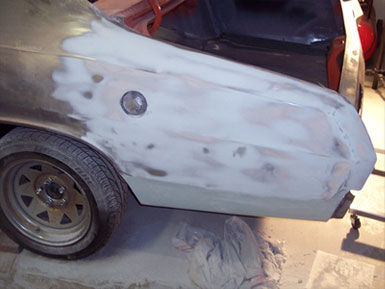
Though Mopar purists are likely to throw a conniption fit, I chose to take a more custom route rather than factory resto, race car, or even a clone. So, side marker lamps were shaved along with door handles and locks. Remote solenoids will take care of door opening chores. A '68 Barracuda flip-top gas cap from Year One was frenched into the original opening where the ho-hum gas cap resided before.


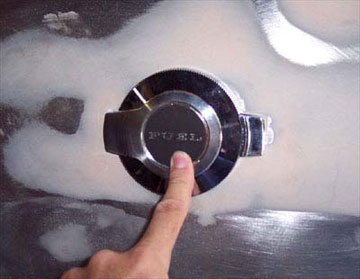
As is often the case, plans change. After a lot of consideration I decided that the flip-top, although cool and retro, would look like a wart on an otherwise shaved exterior. So, with a call to Hagan Street Rods I got one of their fuel doors. They're available in various curves, angles, and door shapes.
They arrive fully assembled and welded however the quarter is a little flatter than their standard (slightly curved) door assembly. I exchanged it for one of their un-welded kits for a little more flexibility. These are quality items!
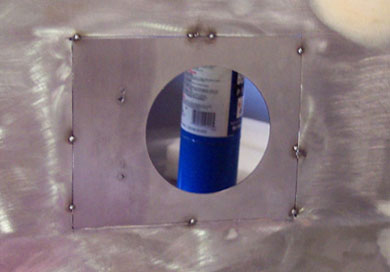
The first step was to cut out my hours of "french" work for the flip-top. Above you can see the outer piece of the Hagan unit. There are a couple of mounting tabs spot welded by Hagan on the back side.
With a little fine tuning of the hole, it's tacked into place. An angled box that accommodates the filler cap, hinge, and latch mounts on the back side - That's why it's so big.
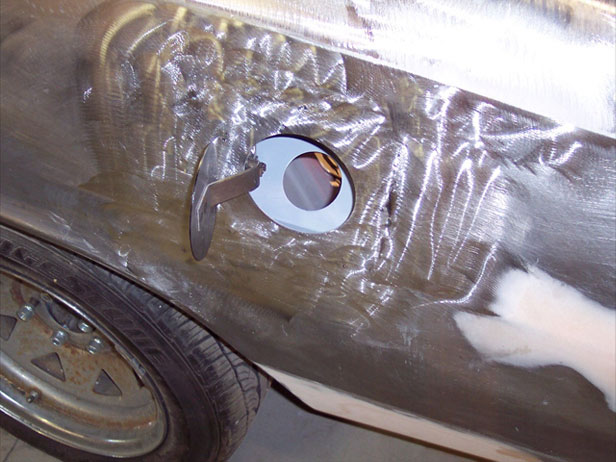
Below, the welds are finished, the box has been plug welded to the back side in the proper position, and the door mounted. A spring-loaded magnet allows you to pop the door open and set it flush with the opening when closed.
I epoxy primed the inside of the box and backside of the panel before plug welding it. That's on advantage of ordering the un-welded kit - it would be tougher to paint inside otherwise.
The kit includes an unique gas cap (not pictured) and filler neck stub. The cap threads into place but has a spring loaded flap in the center that allows you to slip the gas pump nozzle in without removing the cap. Cool!
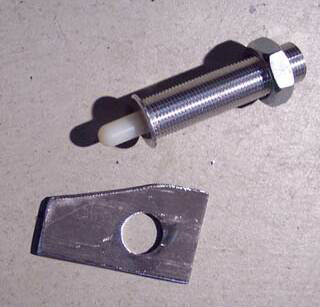
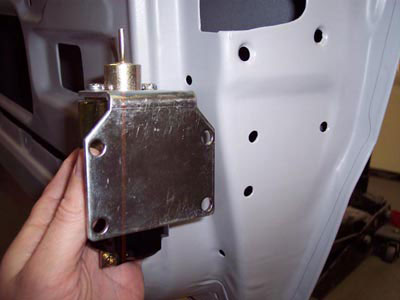
Traditionally, when you shave door handles and use solenoids to pop the doors, a spring loaded "popper" is installed at the striker end of the door to push it open a bit when the door is released. Recently, Electric Life came out with what they call the "Door Jammer". It mounts less conspicuously in the hinge area of the jamb. It's about 3" long and applies a whopping 70 lbs of thrust to the nylon plunger. You can mount it in the jamb or in the door. An aluminum push plate mounts opposite the plunger to spread the load.
I decided to mount it in the jamb, otherwise it would interfere with the glass inside the door.
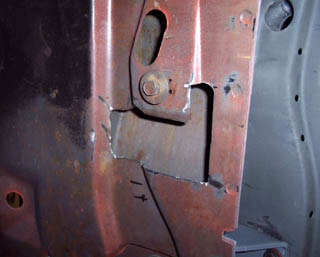
After a test fitting I decided to fabricate and add a .125" thick reinforcing plate (above) inside the jamb behind the popper. Without it, the surrounding sheet metal flexed.
(Right) I cut out some of the inner structure at the kick-panel area for access to mounting and tightening the large nut. Still not enough room to get a deep socket in there (as they recommend) but I can get an adjustable wrench on it, no problem.
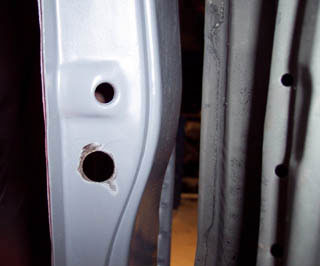
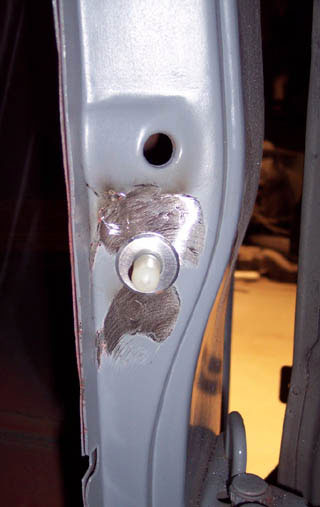
A 3/4" hole was drilled (I love those step drills!) below the door jamb dome light switch hole and the edges cleaned up.
Additional holes were drilled and the reinforcing plate was plug welded into place. The popper does a good job of giving the door a push open without pinched fingers. The driver's side was completed lickedy-split!
(Jan. '07)
(Jan. '07)
Each solenoid will be mounted below the latch mechanism. Their location was determined early on.
This allows for a nice, short, straight pull from a location near the original linkage connection. Other parts of the mechanism will have to be "fixed" so that it won't accidently move into the locked position.
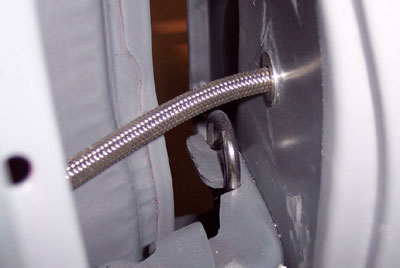
Carefully located holes were drilled in the cowl above the lower door hinge and in the door for billet/braided stainless wire looms. Wires will pass through these on both sides for the door solenoids. The holes in the doors are located more towards the outer skin to make for a larger radius for the loom when the door is closed and to avoid interference with the door glass when it's down.
From here you may wish to go to Reassembly
 |
 |
 |
 |
 |
 |
 |
 |
 |
© 2013 JP Herrick Enterprises - All Rights Reserved
Site updated: January 2014
